Billing Control - Email Billing
| How do I get here? | Financial Menu ► Billing Control Panel ► Email Billing |
| Purpose |
Once the bill run is finished and charge transactions have been posted into the system, it is time for email notifications to be sent out to the customers on the bill run cycle. This tab will show all customer that have elected to receive an email notification that their invoice is ready. The customer must have a valid Billing Email setup on the Invoicing tab in order for their account to be in the list of emails to send. The tools allow for tests or samples to be sent to the user initiating the emails as a quality assurance step prior to sending live emails to the customers. This ensures that all email verbiage and information is correct. The actual email verbiage of the email can be managed via the Email Templates maintenance tool. |
| Security | Billing Module |
| Taxing Impact | N/A |
| Commission Impact | N/A |
| Data Field Definitions | N/A |
Initiation Processes
Initiation Step 1: Select / Verify the Invoice Date:
The Email billing step will be ready once all the billing transactions have been created and posted. Please see Create Billing Transactions.
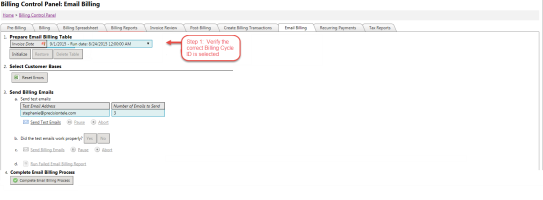
When the screen loads initially, the Invoice Date drop down should already have the proper ID selected. Please be sure to verify that the selection is for the correct invoice date and run date.
Initiation Step 2: Click the Initialize button:
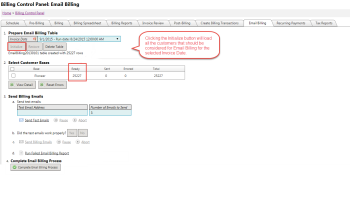
Once the Invoice Date is selected, we must next load all the customers into a data table that have signed up for email billing. This can be done by clicking the Initialize button.
Once the Initialize button is selected, the "Select Customer Bases" table should be filled with Base data showing the number of emails "Ready" to be sent.
The Initialize button will pull the most current data from TBS for email billing. If changes to customer email addresses are made AFTER this button is clicked, users must use the Delete button to remove the table, make any customer updates as needed and then Initialize the data again.
Initiation Step 3: Select the Appropriate Base(s):
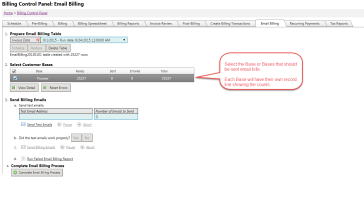
Each Base will have a line record in the Email Billing Bases table. Bases can be run individually or all at one time by selecting the checkbox next to the corresponding base(s).
All the customer data that will be used can be viewed and verified using the View Detail button located below the Email Billing Bases table.
Email Billing Processes
Once the Email Billing Bases table is filled and the proper Base(s) are selected, it is time to start the email billing process.
Email Billing Step 1: Send Test Emails:
It is important to review and QA the email bills each time before sending live emails to customers. This ensures verification of any changes that may have occurred to Email Templates and also provide a way to preview the billing data that is present in the ebill presentation. This is a required step before the "Send Emails" function for live emails is enabled.
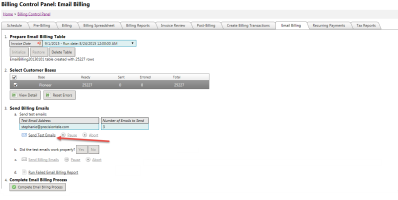
With the Base(s) still selected in the Email Billing Bases table, we are ready to send test emails to the email address in the Test Email Address textbox. This textbox will automatically fill with the logged-in user's email address if it is setup on the User's record. This email address can be edited to send to whomever you wish. Multiple email addresses can be added as well by separating each one with a semicolon.
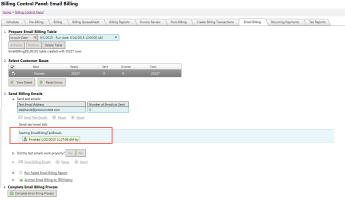
The default number of emails to send is set to 3. This means that 3 emails for each Base/Email Template combination will be sent to the email address(es) in the Test Email Address textbox. Once the email addresses are set and the Number of Emails is set, click the Send Test Emails link.
Once the emails have successfully sent, a confirmation message will appear
Email Billing Step 2: Review /Verify Test Emails:
Clients should review these emails for the following items:
- Invoice Dates
- Images / Logos
- Ensure all links and values have been pulled in properly per customer
- Test the Download Invoice link to ensure the right invoice is tied to the customer
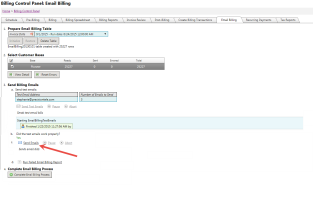
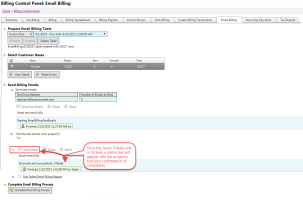
If all of the above items are accepted, our next step is to confirm in TBS these worked properly and send live emails. Click the "Yes" button under the question "Did the test emails work properly". This will disable the "Send Test Emails" link and enable the "Send Emails" link.
Email Billing Step 3: Send Live Customer Email Bills:
Now that everything is verified and we have the right Bases selected, we are ready to send live Email notifications. Ensure the Base(s) checkboxes are still selected and then click the "Send Emails" link. This will start the process of sending live email notifications to the customers. A progress notification will appear showing progress and confirmation of completion. It will also note if any emails may have failed for any reason. These can be viewed using Run Failed Email Billing Report.
The following processes are recommended to help with data cleanup as well as to manage any emails that may have failed to send. These should be completed once the above steps are all complete and the system has confirmed that Step 3: Send Live Customer Emails has Finished.
Email Billing Step 4: Run Failed Email Billing Report:
In Email Billing Step 3 above, the confirmation alert will display a count of any emails that may have failed. The Email Billing Bases table will also show a count of those that may have errorred. There are two types of failed emails that could occur:
1 - A "Deadlock" or "Timeout" issue - This is typically due to sending large amounts (>1500) emails at a time. Depending on the email SMTP server being used, its possible that a "Deadlock" or "Timeout" error was triggered. These emails can be attempted again by simply clicking the Reset Errors button beneat the Email Billing Bases table and then following the above steps again for these remaining emails.
2 - Poorly Formatted Email Addresses - If a customer is signed up for Email Billing but has an empty Billing Email Address or an email address that is invalid, these will fall into the error report as well. These need to be handled manually and cannot be resent since the data being used is a snapshot initiated at the time the Initialize button was clicked. These emails cannot be resent using the Email Billing tool. Be sure to talk with your Account Manager about Data Verification reports that can be setup to discover these types of issues prior to the production bill run in order to eliminate these types of errors.
Complete Email Billing Process
For efficiency purposes, the Initialize step mentioned above will actually take all customer email billing data and create a temporary table that will be used later by the Send live Emails step. This ensures that the system isn't pulling any data that may be in the middle of being updated and cause issues.
Since this creates a temporary table, a "clean up" process is in place that will remove this table and archive it to the TBSHistory database. This allows the data that was used to be kept and archived if ever needed again. Once this step is completed, the Email Billing Bases table will be empty for this Invoice Date.
Note: If the system detects that an archived data table exists in TBSHistory for a Billing CycleID, the Restore button will be enabled beneath the Billing Cycle ID selection. Data can actually be restored and emails sent again by using this Restore button and going through each of the steps above again. This is very rare and it is recommended that you please work with your Account Manager before trying to Restore a previous email billing data set.
